♥ Labels ♥
- Tutorials (36)
- Animations (29)
- St Patricks Day (6)
- Templates (5)
- Valentines (4)
- Easter (3)
♥Chit Chat♥
♥Favorite Scraps♥
♥PSP Stuff♥
♥Blog Archive♥
Sunday, February 01, 2009
Making a TWISTY

Supplies Needed:
PSP
Animation Shop
Tube
Font
Open your tube in PSP.
Open a new transparent image 350 x350 ( or larger but you'll need to crop)
Copy and paste your tube on the canvas.
On top of the tube, apply your text.
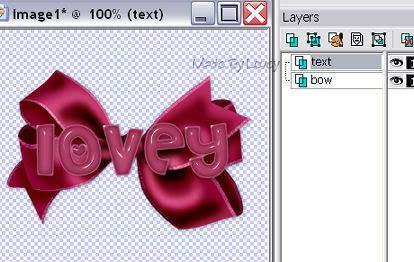
Layer palette, delete raster 1, leaving you with 2 layers.
Tube & text.
Go File, save.
You want to save this as an animation psp image.

Go over to animation shop.
Browse to find the image you just saved.
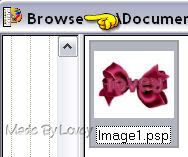
Open image.
You'll notice you have 2 frames.
Now we're going to add the transition.
Make sure your on frame 1 active.
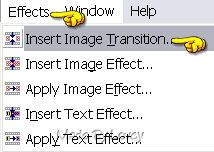
Go to Effects--- Insert Image Transition.
On the drop down, find "twist".
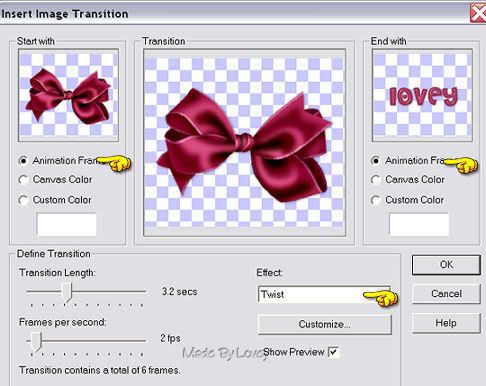
Click ok . The transition will be applied. You will have 8 frames.

Now we are going to do the second transition by copying those frames and pasting them at the end of the animation.
Click on frame 1 making sure the red lines are around that frame.
Go to edit, select all,
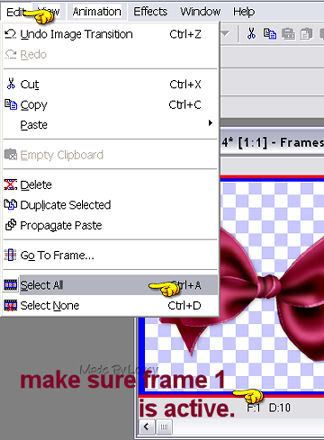
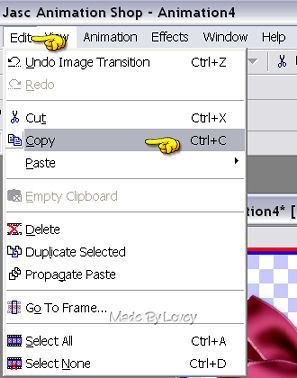
edit, copy.
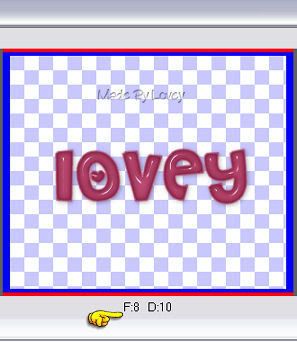
Go to the last frame on your animation. Make sure the red line in around that frame.It shows that frame is active.
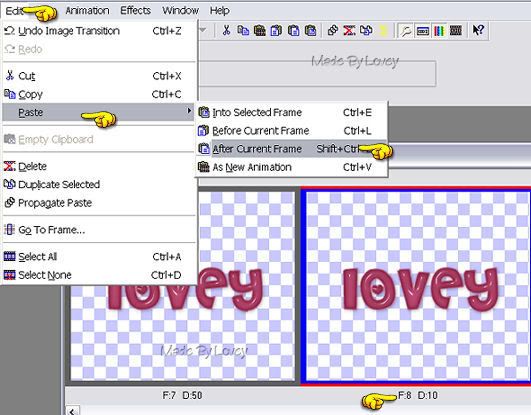
Go to edit, paste after current frame
We want the transition to reverse.
Go to animation, reverse frames.

File save animation as a .gif.
Now we want to reopen that saved animation to make some changes.
Go to file, at the bottom you'll see the animation you just saved.
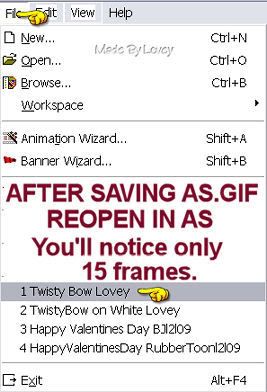
You'll notice there are only 15 frames now. AS crunches identical frames into one.
So we're going to make some changes to the frame speeds.
Edit, select all, animation frame properties, change the number to 15.
Click on frame 7,make sure the red line is on that frame, right click mouse.
Frame properties, change that number to 40. This sets frame 7 speed @ 40.
Do this same step to frame 8.
So all your frames are at 15, EXCEPT frames 7 & 8 they are set at 40.
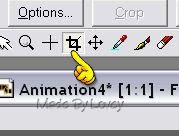
Click on your crop tool.
Then on the options.
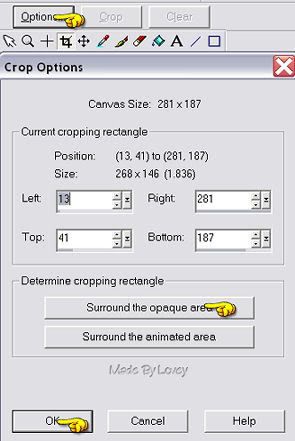
Click to view, and save changes.
Hope you enjoyed this tutorial.
Happy PSPing!!

Subscribe to:
Post Comments (Atom)


0 comments:
Post a Comment