Sunday, September 27, 2009
Hiya :o)
Thank you so much for your well wishes,prayers and hellos.
It's been a difficult few months with hubby having open heart surgery, but finally life is getting back to normal and he's fully recovered!
I hope to return to writing tuts shortly.
If you have any ideas of the type of tuts you'd like to see on my blog, please email me with your ideas,I'd love hear from you.
While here, don't forget to check out the archives for older tuts,especially if you're new to the PSP and Animation shop programs.
Till then, Happy PSPing!!

Monday, February 02, 2009
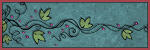
Constellation Fun

Xenoflex constellation can be a lot of fun and applied to many things.
Here's just a fun tut to get your imagination flying.
I've used the constellation on shapes and paintbrushes.
First the shapes:
Pick your preshape tool and find a shape you like.
I picked a heart.
With these settings.

Get the shape how you like, then on your layer palette
convert it to a raster.

Duplicate that layer 2x's.
Rename c1-c2-c3.
C1 Layer highlighted.
Plugins,xeno, constellation.
Try these settings:

Remember, playing with the settings gives you different effects, so have some fun and find ones you like.
Apply.
C2 highlighted, apply the constellation again, but change the random seed.
and repeat for C3.
Xout C2 and C3 layers.
Edit, copied merged. Over to Ashop and paste as a new layer.
Back to PSP, UnX C2 layer, X out C1 layer. Edit, copied merged.
Paste into ashop after current frame.
Repeat for C3 layer, and copy that into ashop after current frame.
Now you have 3 frames in ashop.
Click to view,and see the bling.
Here's one I did with a paintbrush instead of a shape.

And here's another shape.

These are great little add ons for tags, as accents,or backgrounds.
Have fun playing with the settings and constellation on shapes,brushes, and almost anything.
Hope you liked this lil tut.
Happy PSPing.
Sunday, February 01, 2009
Making a TWISTY

Supplies Needed:
PSP
Animation Shop
Tube
Font
Open your tube in PSP.
Open a new transparent image 350 x350 ( or larger but you'll need to crop)
Copy and paste your tube on the canvas.
On top of the tube, apply your text.

Layer palette, delete raster 1, leaving you with 2 layers.
Tube & text.
Go File, save.
You want to save this as an animation psp image.

Go over to animation shop.
Browse to find the image you just saved.

Open image.
You'll notice you have 2 frames.
Now we're going to add the transition.
Make sure your on frame 1 active.
Go to Effects--- Insert Image Transition.

On the drop down, find "twist".

Click ok . The transition will be applied. You will have 8 frames.

Now we are going to do the second transition by copying those frames and pasting them at the end of the animation.
Click on frame 1 making sure the red lines are around that frame.
Go to edit, select all,

edit, copy.

Go to the last frame on your animation. Make sure the red line in around that frame.It shows that frame is active.

Go to edit, paste after current frame

We want the transition to reverse.
Go to animation, reverse frames.

File save animation as a .gif.
Now we want to reopen that saved animation to make some changes.
Go to file, at the bottom you'll see the animation you just saved.

You'll notice there are only 15 frames now. AS crunches identical frames into one.
So we're going to make some changes to the frame speeds.
Edit, select all, animation frame properties, change the number to 15.
Click on frame 7,make sure the red line is on that frame, right click mouse.
Frame properties, change that number to 40. This sets frame 7 speed @ 40.
Do this same step to frame 8.
So all your frames are at 15, EXCEPT frames 7 & 8 they are set at 40.
Click on your crop tool.

Then on the options.

Click to view, and save changes.
Hope you enjoyed this tutorial.
Happy PSPing!!
Saturday, January 31, 2009
Forever Love

This tut is dedicated to Shae and Nikki.
Thanks for your support and inspiration to continue writing these tuts.
For this project I used the fantastic art of Marjolein Gulinski.
This is licensed art.
Please do not use this art without a license and purchase.
You can see and purchase Marjolein's work at:
Supplies needed are:
Tube of choice
Mask of choice
Paper or color layer of choice.
Font of choice.
EyeCandy3-HSB Noise,EyeCandy5Impact MotionTrail and
Xenofex-constellation.
And I used EC4000 for a corona glow ( optional)
Open your tubes in PSP.Open a new white image 550x550.
Copy and paste your paper on as a new layer.
Go to layers,add mask from disk.Find the mask you'd like and apply.
On your layers palette, hightlight mask layer, and delete.
Nighlight group, right click on mouse, merge group.
Rename that layer mask.
Now we are going to make the lil hearts that layer ontop of the mask.
In your color palette,foreground set to white or color of choice from your tube and the background box at null.
Go to your preset tool.
Find a shape in the drop down. I picked a heart.
I changed my lines to dot.
These are the settings I used.

Set on as a vector layer,apply your shape.
When you're happy with the first shape.Go to layer palette and convert to a raster.
Duplicate that layer, change the postion of the next heart and using your deform tool, rotate it a bit to the left.
Duplicate that layer, and move that heart, rotating it abit in the other direction.
Keep doing these steps till you have all the shapes in place that you like.
X out all layers but those shapes. With heart layer highlighted, merge those layers visible.
Copy and paste your tube on as a new layer.
Name it TUBE.
Add your text as a vector layer.
When your happy with it, right click on layer palette and
convert it to a raster.
Rename the layer to TEXT.
Highlight your tube layer on your layer palette.
We are going to put some effects on the tube.
I put a glow around the fairy with EC 4000-Corona at these settings.

Next I put ECandy 5 HBS noise on the wings
Using your freehand tool, with these settings:

Go around the areas of the tube you'd like to put this effect.
Ants are marching.
On your layer palette,right click, CONVERT SECTIONS TO A LAYER.
This puts just the wings on their own layer.

Duplicate that layer 2x's. Rename those layers, N1-N2-N3.
With N highlighted and the ants still marching
Go to effects, plugins, EC3 HBS Noise.
With these settings:

Highlight N2 layer, apply the noise again,but change the random seed to 30.
Highlight N3 layer, apply the noise again, change the random seed to 40.
Selections-Select none.
XOUT N2 & N 3 layers.
I'm going to add some glitter to the fairy's dress.
Highlight tube layer.
Using freehand tool, going around the areas I wanted glittered.
Ants are marching.
Right click on layer palette and PUT THAT SECTION ON IT'S OWN LAYER
Selections, select none.
Duplicate that layer 2x's. Rename layers gl1-gl2-gl3.
Highlight Gl1 layer, adjust, add noise @40

Highlight G2 layer, apply noise again, clicking the uniform button 'x's.
Highlight G3 layer, apply noise again,clicking uniform button 3x's.
XOut G2 & G3 layers.
I want to add some effects to my text.
Highlight Text layer.
Selections,select all, float, defloat,modify,contract by 1.
Ants are marching. Duplicate that layer 3X'S.
Rename layers Tx1-tx2-tx3.
You will have a total of 4 layers of text.
Highlight Tx1 layer, adjust, add noise @ 30.
Tx2 layer,adjust, add noise, click uniform button 2x's.
Tx3 layer, adjust, add noise, click unifrom button 3x's.
Selections, select none.
Back to the original text layer.
Effects, ECandyImpact- Motion Trail, with these settings:

Ok we're almost finished. One more effect I want to put on is a tiny constellation on those hearts.
Highlight the shape, or heart layer.
Duplicate that layer 2x's.
Rename Con1 Con2 Con3.
Highlight Con1 layer.
Effects, xenofex-constellation with these settings:

Apply the constellation.
Highlight con2 layer, apply constellation again, click once on the random seed button.
Highlight con3 layer, apply constellation again, click once on the random seed button.
Ok we're ready to put it together in Animation Shop.
This is what your layers should look like:

Highlight your background layer.
Edit, copy merged.
Animation Shop, edit, paste as a new animation.
PSP, UNX all #2 layers. X out all #1 layers.
Edit,copy merged.
Animation Shop, edit, paste after current layer.
Back to PSP.
UNX all #3 layers, X out all #2 layers.
Edit, copy merged.
AShop, Edit, paste after current frame.
You now have 3 frames in animation shop.
Click to view and if you're happy with it, save as a .gif.
Hope you enjoyed this tutorial.
Happy PSPing!
Monday, January 26, 2009
Making a Wink

I used the fantastic art of Popeye Wong and a scrap kit from Clarey, called spring breeze.
Thanks for sharing your talent Popeye and Clarey.
I'll be paying more attention to teaching the wink, than making the complete tag.
Open your tubes in PSP.Open a new canvas depending on the tag you're making.
Put together your tag.If you want to add any glitter layers do that now.
I added glitter to my text.
3 layers of text, added noise to each layer @ 25.
The last layer/frame is the one we are going to make wink.
So you can put together your first 2 frames now.
X out glitter layers 2 & 3.
Edit, copy merged,
Over to animation Shop, edit,paste as a new animation.
Repeat that step for your second glitter layer.
Make sure you X out glitter layer 1.
Now you have 2 frames in animation shop.
Back to PSP.
UnX glitter layer 3.
Highlight the tube layer on your layer palette.

You might want to zoom in on the eye so you can have a better look at the lines we want to move.

In this tut, I will be using my favorite mover, the "warp brush".
Here are the settings.

Take a good look at the eye. The top lid lash line is where we are going to begin to warp, pushing it down.

REMEMBER, JUST A BIT AT A TIME WARPING.
Slowly push the top lid to meet the bottom lid.
When you almost have the lid closed, begin pushing up on the bottom lash line to meet the top lid.

You have your lid closed and now it's time to take that last layer over to animation shop and put it together with the others.
This is how your layer palette should look:

Go to edit, copy merged, over to Animation Shop.
Edit, paste after current frame.
3 frames in animation shop.
2 with the eye open, and 1 with the lid closed.
Edit, select all, animation, frame properties
change the speed to 18.
Click to view, and if your happy, save it as a .gif
If you would like to redo the warp,go to edit, undo paste.
Back to PSP, Edit, UNDO WARP and keep undoing the warp till it takes you back to the eye opened. Keep warping till you're happy with the wink.
The warp brush takes a while to get the hang of, but it's a great lil tool that will make anything move.
Happy PSPing!!
Glittering a Glow

I'm using Rainbow Coffi roses in this project.
Open tubes in PSP.
Open a new canvas 500 x500.
Copy and paste tube onto canvas.
If you want a glow around the complete tube and text, then add your text now.
Convert text tube to raster. Merge visible the text and tube layer.
Rename the layer tube.
If you just want the glow around the tube, continue on to the steps below.
On your tube layer, go to selections,select all, float, defloat.
Ants are marching.
Layers, add a new raster layer.
Right click mouse on layer palette and arrange that layer down under the tube layer.
Ants are still marching and your on the new layer you just added.
Go to effects,plugins-- eyecandy 3--glow.
These are the settings I used, but play around till you get a glow surrounding you like.

You'll see the glow is outside the tube and there is no tube being glowed.
When you have the effect you want, click the check mark.
Selections, select none.
Add your text now if you didn't earlier.
Remember, adding it now, there will be no glow around the text only the tube.
Tag below I added glow to text and tube.
The tag at top of page,I added glow to tube only.

On your glow layer, duplicate that layer 2x's.
Gl 1--gl 2--gl 3.

Highlight gl 1 layer. Adjust, add noise @ 25
Highlight gl 2 layer. Adjust, add noise, click on the uniform dot twice.
Highlight gl 3 layer. Adjust, add noise, click on the uniform dot
3x's.
X out gl 2 & gl 3 layers.
Highlight your background layer on your layer palette.
We're ready to put it together in Animation Shop.
Edit, copy merged.
Animation shop, edit paste as a new animation.
PSP, X out Gl 1 layer, UnX gl 2 layer.
Edit, copy merged.
AS, edit, paste after current frame.
PSP, X out Gl 2 layer, UnX gl 3 layer.
Edit copy merged.
AS, edit, paste after current frame.
You now have 3 frames in animation shop.
If you like it, save as a .gif
Happy PSPing :o)
Making a Swinger

For this project I used pieces of a kit from Monti's Playground.
You can find it in Monti's kits called Cream & Gold.
Here's supplies of accent swingers that I have collected over the years. Please keep all the file names intact.
The font I used is Conventry Garden.
Let's get started. Open a new canvas 450x450 white or black.
I used black.
Open your supplies in PSP.
On your color palette,forground..click to patterns and find your gold pattern.
Background box on palette on nil.
Text size 100,stroke 3, apply text as a vector.
I used a capital for the H and the other letters are regs.
Postion the text as you like, then right click on layer palette and convert it to a raster.
Rename this layer gold.
With your magic wand,click inside the letters till all letters have ants marching around.

Copy and paste your paper on as a new layer.
Place it over the gold layer.
Highlight gold layer on your layer palette.
Selections--modify--expand by 2--selections invert--
highlight the paper layer, hit delete on your keyboard.
Selections, select none.
On your layer palette, right click and arrange the paper layer under the gold layer.
Highlight the gold layer.
Effects--sculpture--find the gold pattern in the box and apply these settings.

Click ok.
Go to adjust--sharpen--adjust--add noise @ 65.
Copy and paste your swinger tube onto your text as a new layer. Place where you want it to swing.
Rename this layer charm 1.
With your eraser tool,erase part of the link that is on the text, so it looks like the link is wrapped around the text.
You might want to zoom in for this step so you can see it better.

My eraser is set on round, size 3.
Duplicate the charm layer 2 times.Rename charm 2 & charm 3.
Working on charm 2 layer.
Charm 2 go to image, rotate, free rotate.
Direction right--free checked off--15.00
Make sure the checkmark is beside "rotate single layer around canvas".
Place the erased part of the chain back to the same postion as on charm 1.
We want that chain link to match up as they swing.
Highlight Charm 3 layer.
Image,rotate,free rotate.
Same settings, but change the right to left.

Move the chain link back into place on the text.
Highlight charm 1 layer--adjust--sharpen
Highlight charm 2 layer--adjust--sharpen
Highlight charm 3 layer--adjust--sharpen.
Now you can go to each layer and apply a drop shadow if you want.
Make sure you have the same shadow on all layers.
Add your tagger mark on the background layer.
We're ready to put it together in animation shop.
XOUT Charm 2 & 3 layers.
Highlight background layer.
Edit, copy merged, over to AS, paste as a new animation.
Back to PSP, X out charm 1 layer, UnX charm 2 layer.
Edit, copy merged, paste into animation shop after current frame.
PSP, UnX CHARM 1 layer,X out charm 2 layer.
Edit,copy merged, paste into AS after current frame.
PSP, UnX charm 3 layer, X out charm 1 layer.
Edit, copy merged, paste into AS after current frame.
You now have 4 frames in animation shop.
Charm 1-Charm 2-Charm 1-Charm 3.
Go to edit, select all, Animation,frame properties and change the speed to 18.
Click on view, if you like it, save as a .gif.
Happy PSPing!!
Subscribe to:
Posts (Atom)
♥ Click for my profile ♥
loves2pspxox@aol.com


♥Grab My Blinkie♥

♥Places I Love♥