Saturday, August 23, 2008
ADDING TEXT TO ANIMATIONS
A simple way to add a text to any animation using PSP and Animation shop together.
Open your PSP and animation shop.
In animation shop look in your folders, find the animation you want the text on.
Activate ( put cursor on) the first frame.
Click top toolbar, EDIT, COPY.
Go over to PSP.
Click EDIT, PASTE AS A NEW IMAGE.
The first frame of your animation is now in PSP.
This will help you determine size and placement of text.
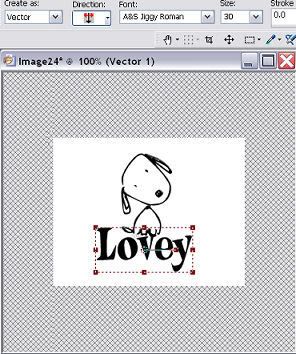
Pick the color and font of text you want on the animation.
You can use the dropper to match colors in the animation by clicking on the color box and bringing dropper (cursor) onto the animation.
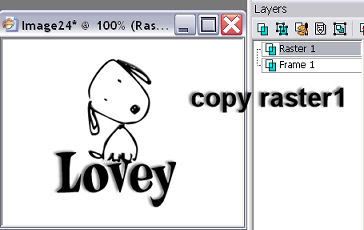
Once you have your color of text, click on your text tool and apply your text as a vector layer.
Vector layer allows you to stretch or shrink by pulling the nodes.
When you have the size and shape of text you want, convert that layer to a raster.
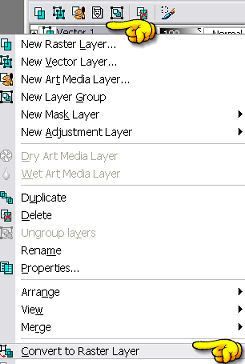
Now you can add effects to the text.
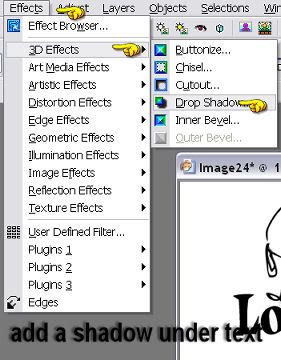
I have used and inner bevel and drop shadow.
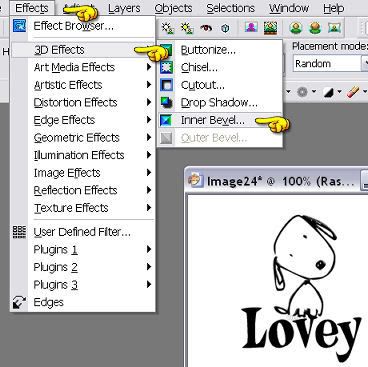

Click ok, then back to effects for your drop shadow.
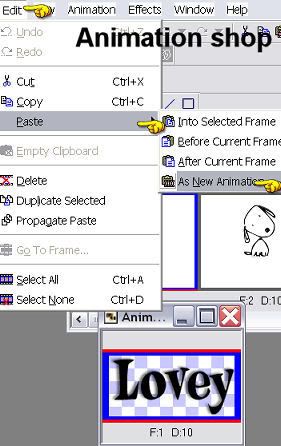
Once you like the text, it's time to copy that layer and paste it in animation shop as a new animation.
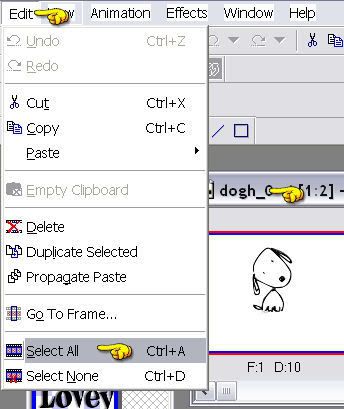
To make sure the text appears in ALL FRAMES of the animation,activate the animation ( put your cursor on the first frame of animation) click EDIT, SELECT ALL. This selects all the frames.
Now your going to paste your text into all frames on the animation.
Click the propagate paste icon on your toolbar. It's the 3 lil stacked papers.

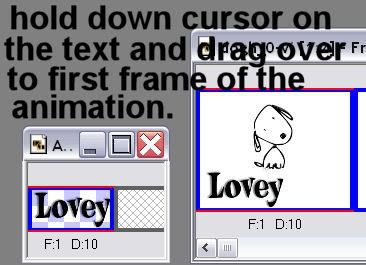
Drag the text over to the first frame of the animation.
Let go of your cursor when you have the text placed where you want it on the animation. It will then appear in all frames.
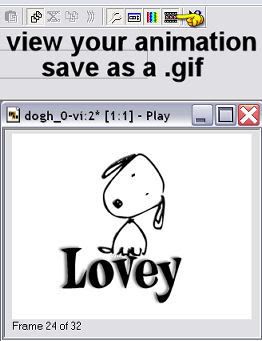
Your finished!

Sometimes the animation you want to add text to doesn't have enough room.
In this case, you must first make a new animation before copying the frame in PSP.
Here are the steps for that process.
Open a new canvas in animation shop.
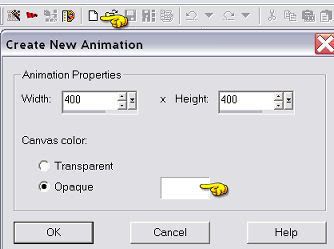
The color will depend on what the background color is on the original animation, use the same background color in your new canvas. Sometimes, the back on the original is transparent, if that is the case with the one you are working on, then make the new canvas transparent too.
I find it easier to make the new canvas with a white background because I love adding effects to the text.
When a text with effects is on a transparent back, the outline is not always appealing.
Play around till you find what you like.
Ok on with the tut.
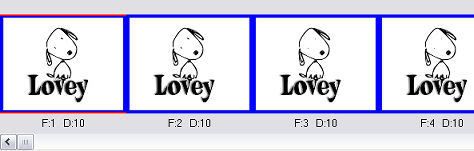
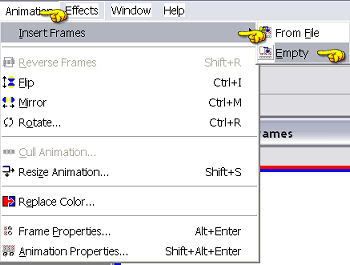
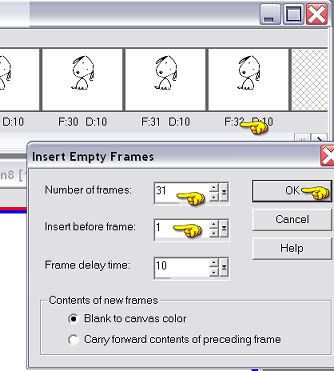
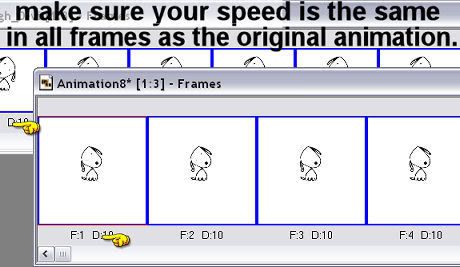
Make all the same amount of frames in your new animation as in your original. You will find this number out by looking at the bottom of your original animation.
F= frames
D= speed of the frame
Always make the top number 1 less than the full frame amount.
Now we are going to copy the original onto the new canvas.
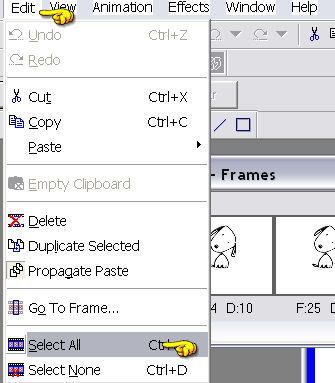
Activate the orginal animation, edit, SELECT ALL,
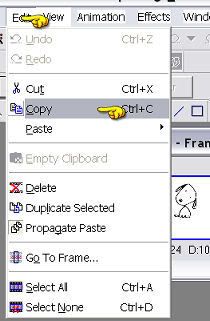
edit, COPY.
Activate your new canvas ( put cursor on first frame)
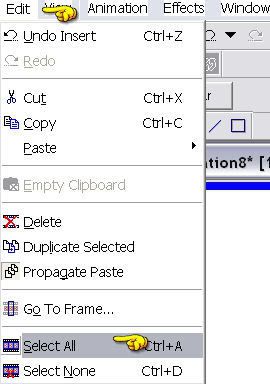
Edit, SELECT ALL.
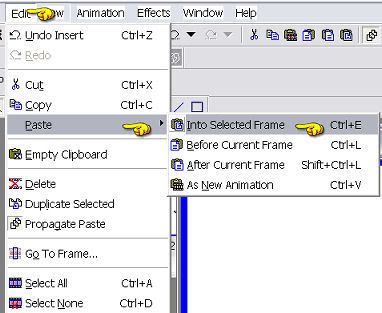
Edit, paste into selected frame.
This makes sure you have selected all frames for the copy to go be pasted.
Now all your frames have the image pasted.
You are now ready to add your text following the steps using PSP.
Open your PSP and animation shop.
In animation shop look in your folders, find the animation you want the text on.
Activate ( put cursor on) the first frame.
Click top toolbar, EDIT, COPY.
Go over to PSP.
Click EDIT, PASTE AS A NEW IMAGE.
The first frame of your animation is now in PSP.
This will help you determine size and placement of text.

Pick the color and font of text you want on the animation.
You can use the dropper to match colors in the animation by clicking on the color box and bringing dropper (cursor) onto the animation.
Once you have your color of text, click on your text tool and apply your text as a vector layer.
Vector layer allows you to stretch or shrink by pulling the nodes.
When you have the size and shape of text you want, convert that layer to a raster.

Now you can add effects to the text.
I have used and inner bevel and drop shadow.


Click ok, then back to effects for your drop shadow.

Once you like the text, it's time to copy that layer and paste it in animation shop as a new animation.


To make sure the text appears in ALL FRAMES of the animation,activate the animation ( put your cursor on the first frame of animation) click EDIT, SELECT ALL. This selects all the frames.

Now your going to paste your text into all frames on the animation.
Click the propagate paste icon on your toolbar. It's the 3 lil stacked papers.


Drag the text over to the first frame of the animation.
Let go of your cursor when you have the text placed where you want it on the animation. It will then appear in all frames.


Your finished!

Sometimes the animation you want to add text to doesn't have enough room.
In this case, you must first make a new animation before copying the frame in PSP.
Here are the steps for that process.
Open a new canvas in animation shop.

The color will depend on what the background color is on the original animation, use the same background color in your new canvas. Sometimes, the back on the original is transparent, if that is the case with the one you are working on, then make the new canvas transparent too.
I find it easier to make the new canvas with a white background because I love adding effects to the text.
When a text with effects is on a transparent back, the outline is not always appealing.
Play around till you find what you like.
Ok on with the tut.
Make all the same amount of frames in your new animation as in your original. You will find this number out by looking at the bottom of your original animation.
F= frames
D= speed of the frame

Always make the top number 1 less than the full frame amount.

Now we are going to copy the original onto the new canvas.
Activate the orginal animation, edit, SELECT ALL,

edit, COPY.

Activate your new canvas ( put cursor on first frame)
Edit, SELECT ALL.

Edit, paste into selected frame.
This makes sure you have selected all frames for the copy to go be pasted.

Now all your frames have the image pasted.

You are now ready to add your text following the steps using PSP.
Subscribe to:
Post Comments (Atom)
♥ Click for my profile ♥

loves2pspxox@aol.com


♥Grab My Blinkie♥

♥Places I Love♥


0 comments:
Post a Comment