♥ Labels ♥
- Tutorials (36)
- Animations (29)
- St Patricks Day (6)
- Templates (5)
- Valentines (4)
- Easter (3)
♥Chit Chat♥
♥Favorite Scraps♥
♥PSP Stuff♥
Sunday, January 25, 2009
Making a Blinkie
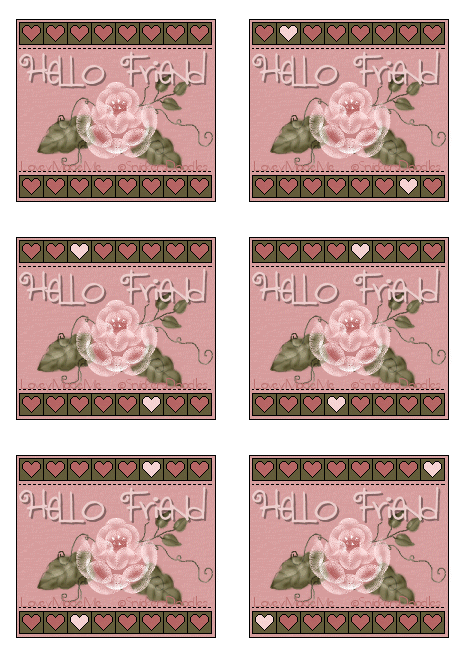
There are some great blinkie makers and I tip my hat to you!
Making blinkies is a true art.
I'm more a collector of blinkies than I am maker.
My favorite blinkies to collect are those made by Lori and Sharon.
The talent those 2 ladies have is outstanding.
KUDOS ladies!!
Here's my try and writing a tut to make a blinkie.
Blinkies are layers.
Each layer with a different color in a spot.
Once put together the colors blink.
Here's what my finished blinkie looks like in animation shop.
Notice the layers, and the spot where the different color is in the small heart.
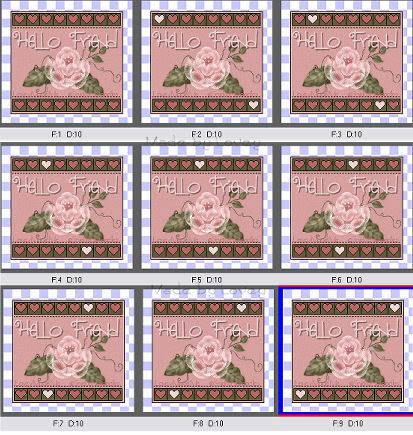
There are many different sizes of blinkies.
The big ones are easier to work on when starting.
I have used a template made by LoriM.
Lori shares her creations.
Please make sure you follow her TOU.
Scroll down to her "Blinkie Templates button" it will take you to her blinkie temps to download. She has fantastic templates!
Thank you Lori for sharing your talent :o)
Ok let's get started.
Open your template and tube in PSP.
Open a new white canvas 400x400.We'll crop later.
Copy and paste your blinkie template onto your canvas.
Rename that layer TEMP.
Using your magic wand with these settings:
Mode= addshift,matchmode=RGB value,Tolerance=1,checkmark beside contguous,0 feather,checkmark beside anti-atlas, inside.
Click inside the main background box. Ants are marching.
Flood fill with a color of choice.
Select none.
Magic wand, click inside all the lil hearts (the blinks)flood fill those with a color either same or different than the one you used as a main background.
Those are going to be your base color on the blinkie.Mine is the dark rose.
Add your tube as a new layer.
Add your text as a vector layer and place where you want it.
When you're happy with the text, right click mouse on layer palette,convert to a raster.
X out the background and template layer.
Highlight top layer ( tube n text ) merge layers visible.
Rename tube.
These are the layers you have now.
Background (white)Template base and tube.
I made all my layers in PSP then copied them over to animation shop to put together.
Let's begin the blinks.
Highlight the template layer.
Using magic wand, click the first heart top left corner, and the bottom left corner.Ants are marching.
Layers, add a new layer, move under the template.
Flood fill those hearts with a color of choice.
Select none.
Highlight template layer,click inside the second heart on top row and bottom row.
Layers add a new layer, flood fill with a different color.
Select none.
Keep doing this till you have all the hearts filled adding a new layer each time you move to another heart.
Here's a look but I didn't merge my tube n text before taking this:
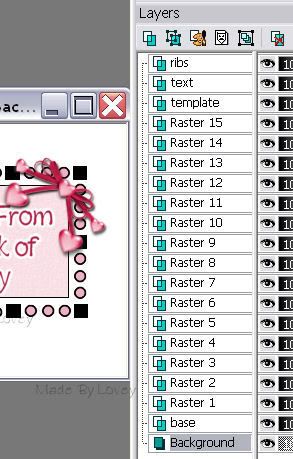
Once you have all the blinks filled in, it's time to put it together in Animation Shop.
Crop your canvas.
**If you want the blinkie transparent instead of on a white background, in PSP XOUT background layer before copying merged into AS**
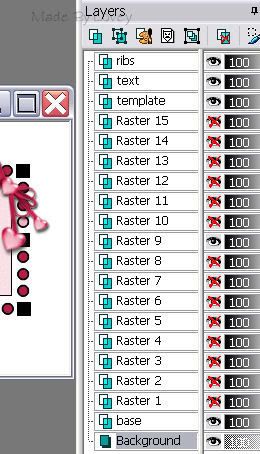
X out all layers, except, background,temp and tube.
Highlight background layer, edit, copy merged, over to AS, paste as a new animation.
Back to PSP, UnX layer 1 fill,edit, copy merged, paste into AS after current frame.
PSP, X out layer 1, unX layer 2 fill, edit, copy merged, paste into AS after current frame.
Keep doing this till you reach the top layer with your final blink.
In Animation Shop you should have all your frames.
Click to view the blink. If you like it, save as a .gif.
Happy PSPing!

Subscribe to:
Post Comments (Atom)



0 comments:
Post a Comment