♥ Labels ♥
- Tutorials (36)
- Animations (29)
- St Patricks Day (6)
- Templates (5)
- Valentines (4)
- Easter (3)
♥Chit Chat♥
♥Favorite Scraps♥
♥PSP Stuff♥
Thursday, January 08, 2009
Valentine Sweetheart
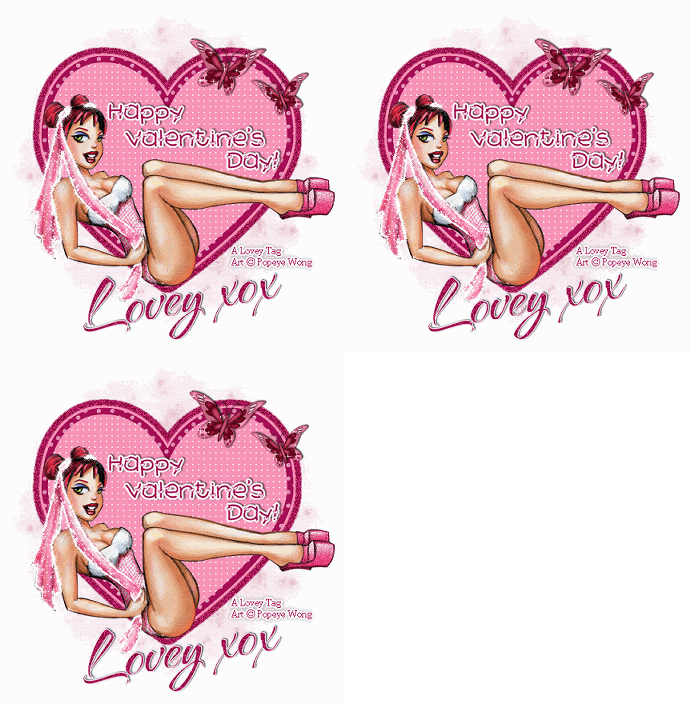
I used the wonderful art of Popeye Wong.
This artist allows use without a license.
Thank you so much Popeye!
You need PSP and Animation Shop
In this project I used 2 plugins.
DBS and Xenoflex constellation.
I used a scrap kit from called Rosie Elegance by Monica at Simply Sensational Scraps.Thank you for sharing your talent Monica.
You can get the free kit
I used a mask from Weescotlass Creations~WSL_75.
Thank you for sharing your talent Chelle.
You can get the WSL mask collection
Other Supplies:
Tube of choice
Font of choice
Open your tubes and mask in PSP.
Open a new white image 600 x 600.
Go to layers, add a new raster layer.
Copy and paste a paper from the scrap kit ( I used paper16) as a new layer.
Go to layers, new mask layer, from image. Find your mask in the drop down and apply.
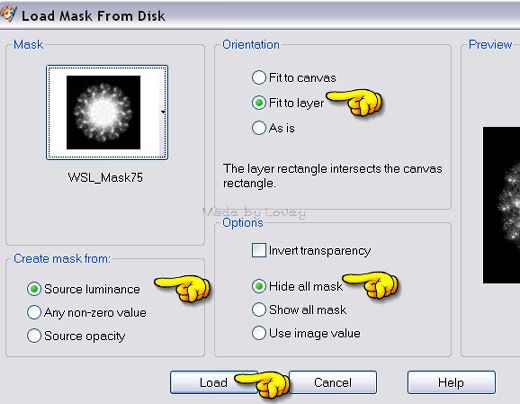
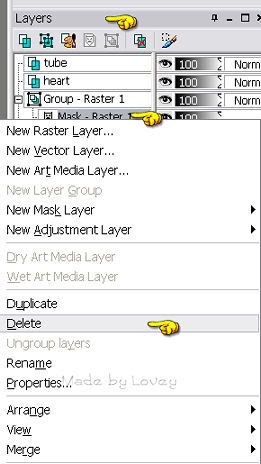
On your layer palette, highlight mask layer, right click mouse, delete.
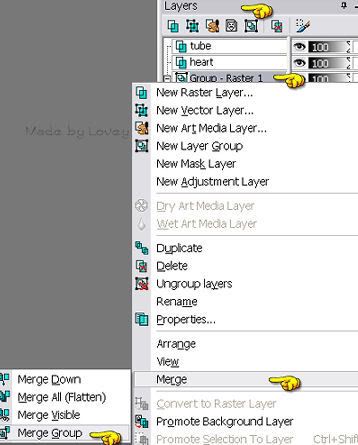
Highlight group layer, right click mouse, merge, merge group.
Rename layer Mask.
Copy and paste the heart frame onto your project as a new layer.
With your magic wand, click inside the frame.
Go to selections, modify, expand, by 3.
Keep the ants marching.
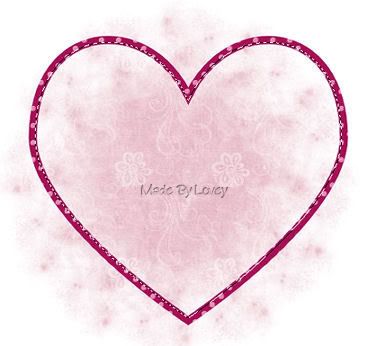
Highlight the mask layer, go to layers, add new raster layer.
Flood fill that layer with color of choice, I used #FC96BA
Effects, texture effects, WEAVE.
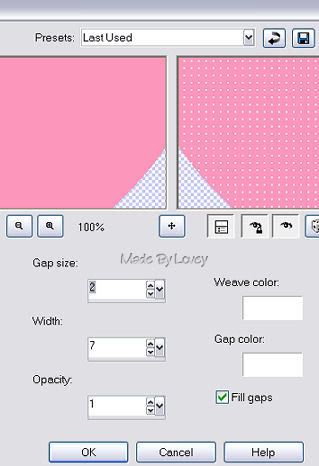
These settings:
Gap size = 2 , Width = 7 , Opac = 1 , weave color white-gap color white- check mark in fill gaps.
Click ok.
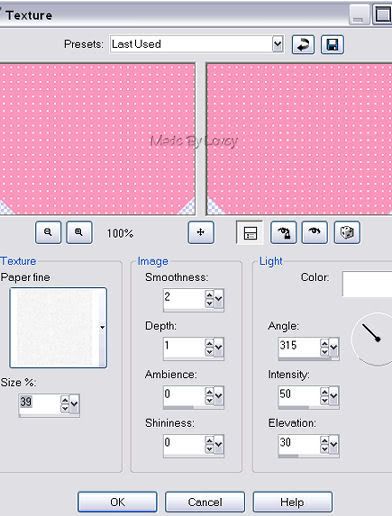
Effects, texture, look in the drop down and find fine paper.
Size 39% Smooth = 2 , Depth = 1, Amb = 0, Shine = 0, Angle = 315, Intensity = 50, Elevation = 30
Color white.
Click ok.
Selections-- select none.
On your layer palette, X out white background layer and mask layer.
Highlight heart layer and merge visible the outside frame with the inside patch.
Rename that layer heart.
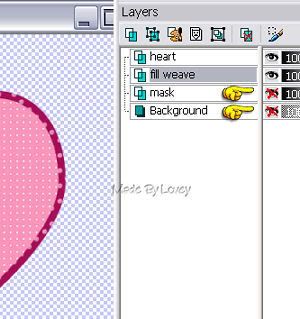
UnX white background and mask layer.
Highlight heart layer.
Go to effects, Eye Candy 3, GLOW.
Use these settings:
Width = 6 , Opac = 100 , Opac Dropoff = Medium ,
Color = #FC96BA
Click the check mark.
Now you have a glow on the outside of the heart.
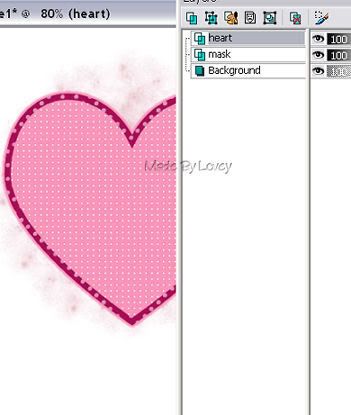
With the heart still highlighted on your layer palette, select all, float.
Select all defloat, modify, expand by 10.
Keep ants marching.
Highlight MASK layer on your layer palette and add a new raster layer.
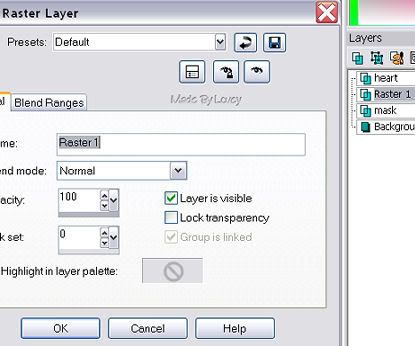
Flood fill that layer with a color of choice for an outside glitterglow.
I used #A60E57.
Selections - select none.
Rename that layer, glow.
Duplicate that layer 2 x's for a total of 3 glow layers. Rename glow 1, glow 2, glow 3.
Now we're going to add some noise to those layers.
Highlight glow 1 layer, adjust, add noise @ 50. dot in uniform.
Highlight glow 2 layer, adjust, add noise, click on uniform 2 x's.
Highlight glow 3 layer, adjust, add noise, click on uniform 3 x's.
X out glow layers 2 & 3.
Highlight heart layer on your layer palette.
Copy and paste your main tube onto your project.
Add a drop shadow to your tube.
Time to add some elements from your scrap kit.
I used some butterflies.
Place your elements anywhere you like and use as many as you like.
When you have all your elements placed, X out everything on your layer palette except the elements.
Merge all your elements visible and rename that layer to EL.
UnX everything.
Add your text as a vector layer. Rename layer Text
Place it where you want, and when your satisfied with it, right click on mouse and convert to a raster.
Add your tagger mark and the copyright information as vector layer.Rename layer CR
Time to add effects to our main tube.
Highlight tube layer on your layer palette.
Using your freehand tool to make selections in the areas on your tube you want to add effects.
I selected the gals outfit and shoes to add DBS noise.
Once you have your selections made, right click on your layer palette, PROMOTE SELECTIONS TO LAYER.
That puts the parts you have selected on a new layer.
Duplicate that layer 2 x's.
Total of 3 layers for effects.
Rename the layers. DBS 1, DBS 2, DBS 3.
Highlight DBS 1, go to effects, plugins, DBS, bright noise @ 28, dot beside MIX. Click ok.
Highlight DBS 2 layer, effects, plugins, DBS, bright noise, click on the dot at mix 2 x's.
Highlight DBS 3 layer, effects, plugins, DBS, bright noise, click on the dot at mix 3 x's.
If you don't have the DBS plugin, you can use the add noise in your psp program.
X out DBS layers 2 & 3.
I added constellation effect to the ribbon on her hair.
If you want to do this too, highlight the tube layer again.
Use freehand tool to outline that selection. Keep ants marching.
Right click mouse on layer palette and promote this section to a layer.
Duplicate that layer 2 x's. Total of 3 layers for the ribbon.
Rename those layers Cons 1, Cons 2, Cons 3.
Highlight cons 1.
Effects, plugins, xenoflex2, constellation.
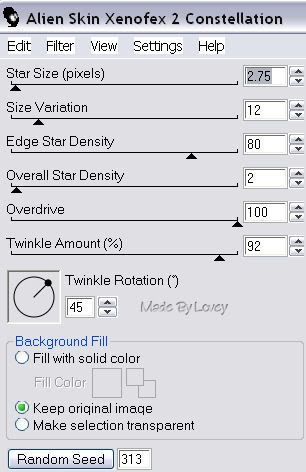
Highlight cons 2 layer, back to the plugin, and click on random seed once.
Highlight cons 3 layer, back to the plugin, click random seen once.
X out con layers 2 & 3.
I added some sparkles to my butterflies.
Duplicate the butterfly layers 2 x's.
Apply sparkle effect on each layer of the butterflies.
X out 2 & 3 butterfly layers.
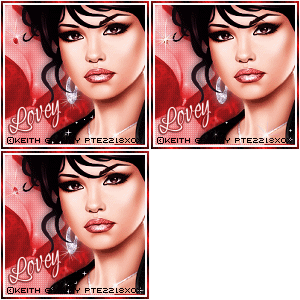
We're ready to put it together in Animation Shop.
This is what your layer palette should look like.
All # 2 & # 3 layers are X out.
Highlight white back ground layer on your palette.
Edit, copy merged, over to AS, edit paste as a new animation.
Back to PSP.
UnX all #2 layers, and X out all #1 layers.
Edit, copy merged, paste into AS after current frame.
Back to PSP.
UnX all #3 layers, X out all #2 layers.
Edit, copy merged, paste into AS after current frame.
You have 3 frames in Animation Shop.
If you want to resize, do that now.
Resize to 90 % - bicubic resample.
Click to view animation.

If you're happy with it, save as a .gif
:o)
Subscribe to:
Post Comments (Atom)


0 comments:
Post a Comment